We spend much of our waking hours working. And for many of us this involves sitting at a desk in a chair in front of a computer – at home or the office. This logically makes your office chair, while not quite something to get emotionally attached to, rather important. And how you sit in and set up your chair can influence whether you feel comfortable or awkward and achy.
Instinct tells you that you should just be able to plonk down in your chair, and that’s the end of it. The reality is, if you do any kind of prolonged sitting, you need to adapt your chair in a way that is as unique to you as your fingerprint. That takes a wee bit of time. And it’s totally worth it.
Chair Controls
The more you can adjust your chair to fit your needs, the better. At least that’s the logic. But, if you have a $1,000 chair with every conceivable setting and don’t know how to use it, you might just be better off with an inexpensive, budget chair with a few settings you understand.1
Prolonged periods of static sitting in awkward postures is associated with an increased risk of suffering with musculoskeletal problems, including discomfort and muscle tension in the neck, shoulder and back. However, an adjustable office chair correctly set up can reduce the severity, intensity and frequency of musculoskeletal problems.23
Alas, the many features of an office chair are discombobulating at best, even in the unlikely event the you’ve had the time to read through its 50-page user guide to solve this modern day Gordian Knot. And it’s true, most of us do not know how to adjust our chair beyond changing armrest and seat height.4
Learning how to use the chair, understanding how to adopt healthy postures, and combining that knowledge to adjust your chair correctly is key to preventing musculoskeletal problems.5 This guide takes the hard work out of it, includes easy to understand diagrams and breaks it all down into simple to follow instructions.
If your office chair comes with all the bells and whistles, you’ll probably recognize most or all of the various features explained below. If your chair has few controls or your kitchen chair is pulling double duty, don’t dispair. Each step shows you how make your minimalist chair more ergonomic and comfortable, using simple add-ons you can buy or MacGyver with some simple household items.
The Goal: Neutral Posture
Ideally your chair should have adjustable height and lumbar support. Most office chairs also boast further controls that should be fine tuned to suit your needs. The goal is to adjust your chair to facilitate a neutral posture, to prevent pain and discomfort.
Neutral posture is just pro talk for sitting for a prolonged period of time in a way that is comfortable, requires minimal effort, and reduces the risk of developing a musculoskeletal disorder. Basically this translates into a posture in which the musculoskeletal system doesn’t have to do much, the natural curves of your spine are supported, and your body is in good alignment.6
The guidelines below are for adjusting your chair when working on a computer, and are a starting point. Tweak it to suit your body, the work you’re doing, and how you are feeling.
Step 1
Adjust Seat Height

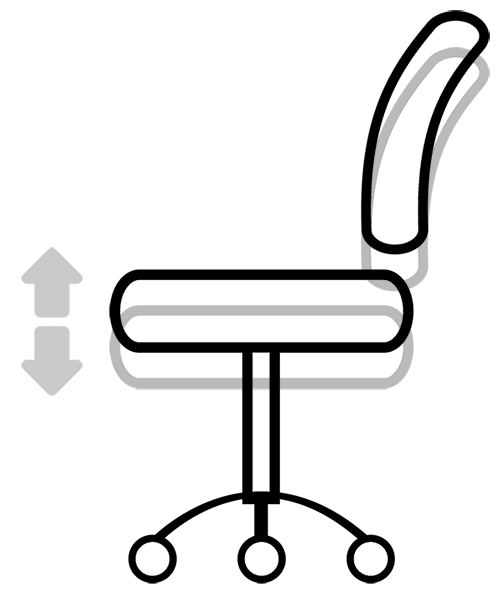
There are many things that may be adjustable, but key is chair and desk height – both must fit you. Chair and desk height need to harmonize to facilitate good sitting posture. Think of them as one unit. A mismatch between them is associated with a number of musculoskeletal problems including back and neck pain.7
Ideally the chair is adjusted to fit your legs, and the keyboard/ work surface to your arms. However, how you adjust the seat height will depend on whether you have an adjustable or fixed height desk.
Option 1: Desk Adjustable
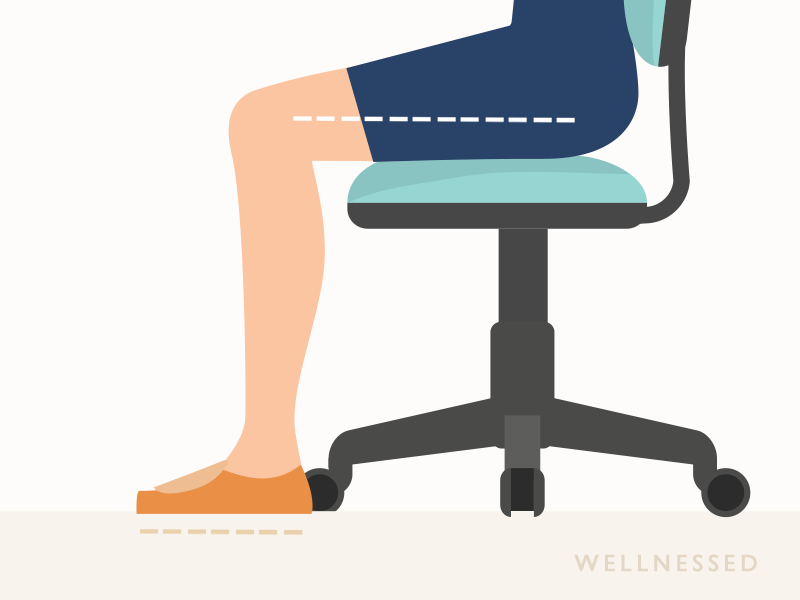
Goal: Feet can rest flat on the ground and your thighs are about parallel to the floor.89
Adjust the height to suit the shoes you are wearing. If you change your shoes you will need to change the height of the chair. For example, if you wear higher heels, you will need to raise the chair higher.10
How to adjust: Stand in front the chair. Adjust the chair height until the top of the seat pan is level with the bottom of your kneecap.
Next, make small adjustments while seated in the chair until your thighs are parallel to the floor (or slightly sloping down).
Option 2: Fixed-Height Desk
If you have a fixed height desk, adjust the height of your seat to optimally position your upper body. Then, if necessary, make adjustments to position your feet and legs.11
Goal: Chair at optimal height to type with a straight wrist on keyboard.1213
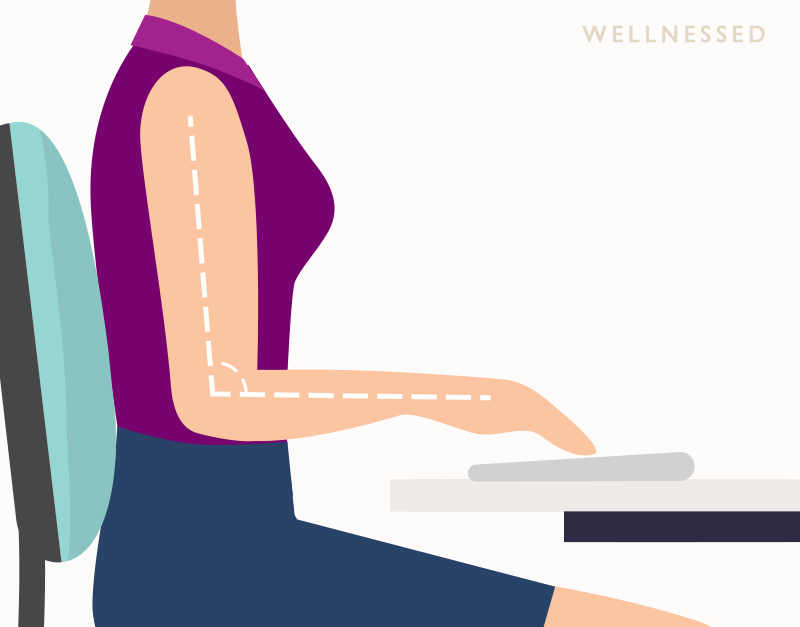
How to adjust: Sit in the chair with shoulders relaxed and arms resting comfortably by your side.
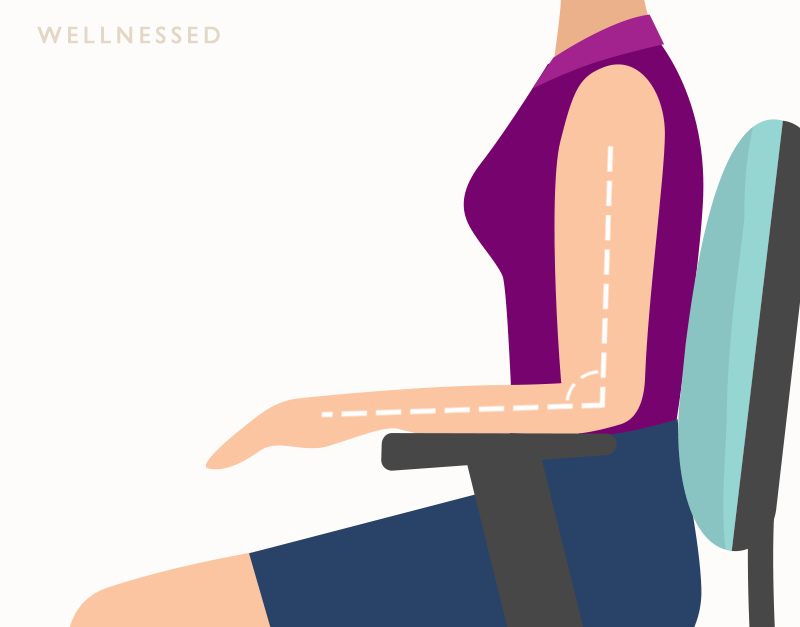
Adjust chair height so that your forearms are parallel to the floor (or slightly sloping down), with your fingers hovering just above the keyboard and your elbows bent about 90º.14
Now you’ve adjusted the chair to suit your arms, check if you are still able to rest your feet firmly on the floor.
If the chair is too high and you are unable (or barely able) to rest feet flat on the ground, use a footrest to raise them. If the chair is too low now, you need a higher desk (or use desk riser blocks).
Chair controls: A lever on the (right) side of the chair.
Add-on: If you have a fixed height desk that results in having to adjust the chair higher to reach the keyboard, consider adding a keyboard tray to move the keyboard to the optimal (lower) height. This is a better solution than adjusting the chair to your upper body and using a footrest.
A footrest is not optimal, because it allows for only one place to rest the feet, thus limiting the ability to shift postures frequently throughout the day.
- Chair too high: Results in being unable to rest feet on the ground, which increases pressure on the back of your thighs, reducing circulation. To get some support, you may rest your feet on chair prongs resulting in a tight angle at the knees. When using keyboard, you may have to bend wrists which is undesirable.
How to know: You may feel pressure on the back of the thighs especially in the area towards the edge of the seat.
Solution: If your feet do not reach the floor, use a footrest (or a big thick, sturdy book!).
- Chair too low: Smaller area of your thighs is in contact with the chair, all the pressure from sitting is placed on your butt (particularly the sit bones), increasing pressure there and resulting in discomfort. Knees higher than the hips flattens the curve of the lower back, increasing pressure on your intervertebral discs, which can lead to low back pain.
How to know: You might feel pressure on the top of your thighs or butt.
Solution: If you’re tall and your knees are above your hips, but the seat cannot be set any higher, use a seat cushion or folded towel to raise the seat height.
Step 2
Adjust Seat Depth

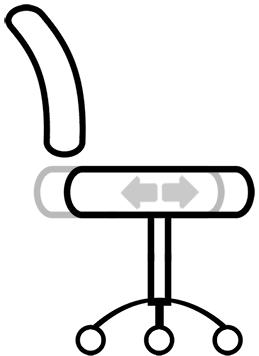
The depth of the seat is another important setting. This feature allows you to adjust the depth of the seat by sliding the seat pan in and out. Some office chairs change seat depth by moving the backrest instead, though this is less optimal.
Generally, a taller person will need greater seat pan length, while a shorter person requires less seat pan length.
Goal: The full length of your thighs should be supported, without the seat cutting into the back of your knees. You should be able to sit right back in the chair so that your back can be fully supported by the backrest.
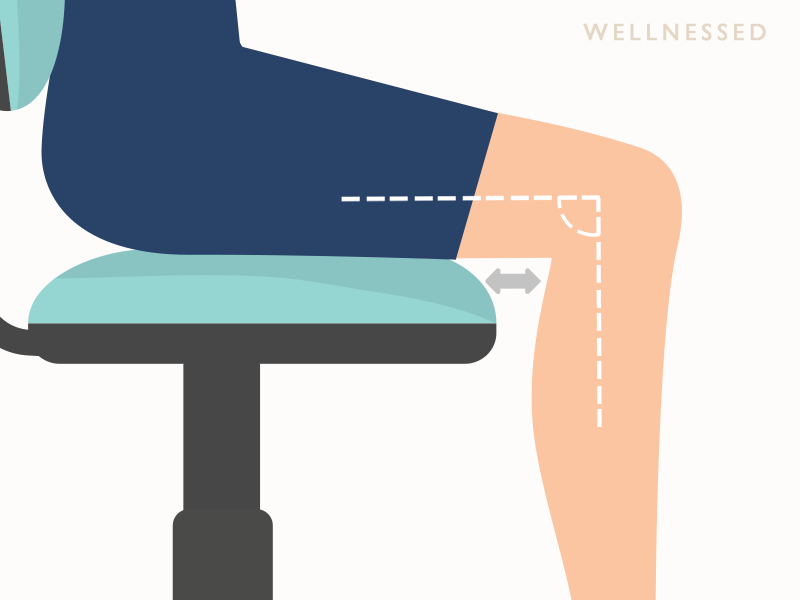
Chair control: Typically a lever under the front center or side of the chair.
- Seat too shallow: This means the area on which you sit is too small. The entire pressure from sitting is put on a small area of the thighs, which may cause discomfort.
Solution: Unfortunately, you need a new chair.
- Seat too deep: This means the area on which you sit is too large. The front of the seat may digg into the backs of your knees, decreasing circulation and putting pressure on the nerves and tendons. To avoid this discomfort you are likely to perch on the edge of your seat, losing contact with the backrest, which means loss of back support, compromising posture and causing the muscles to overwork.
Solution: Use a backrest cushion or place a towel over the backrest. This will shift you forward while keeping contact with the backrest.
Tip! Avoid rounding your back, leaning forward, or sitting at the edge of your seat. Sitting in a way that does not support your lower back properly is more likely to overwork and fatigue your muscles.
Step 3
Adjust Seat Tilt

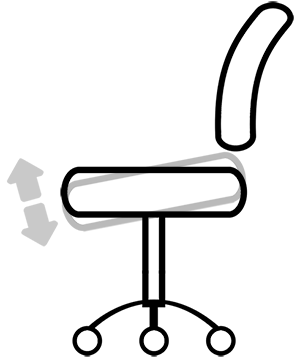
The standard setting is a level seat pan and thus requires no adjustment. However, the seat tilt feature is great for varying posture throughout the day. Movement is healthy, as it helps your body to recover from sitting in prolonged static postures (which has adverse effects), and shift the weight to other parts of the body.18
When working forward (e.g. typing), your thighs should be parallel with the floor or sloping down slightly, so that your knees are a touch lower than your hips. A slightly down thigh posture can take some of the stress and tension off the lower back.19
Goal: The seat tilt should support the position you’ve adopted and the task you’re doing.
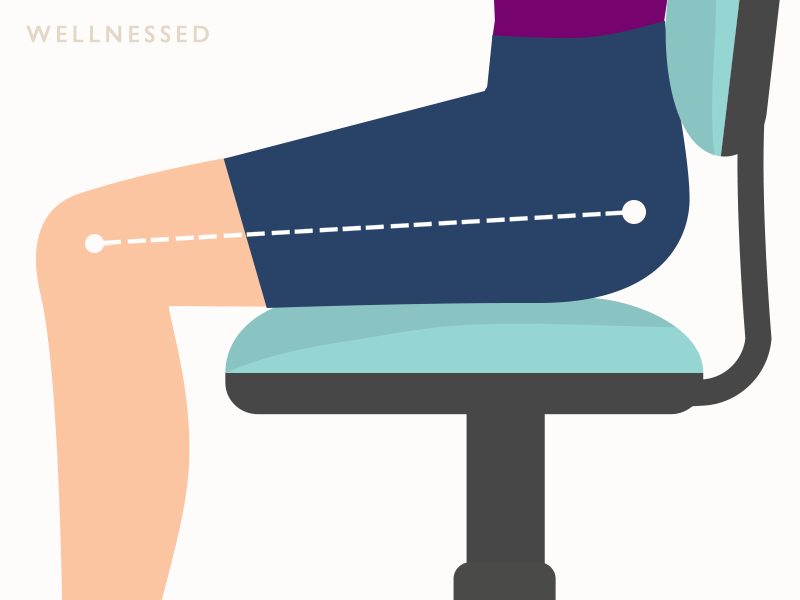
Your thighs should be parallel with the floor or sloping down slightly, so that your knees are a touch lower than your hips.202122
Another option is a slight backward tilt to help keep you in the seat, which some people find more comfortable and may help them shift their body weight onto the backrest.
If you tilt the chair forward, raise the chair height slightly so that your legs and feet remain in the correct position.
Chair controls: Usually a lever on the side of the chair.
Add-on: If you find the forward tilt position comfortable, but your chair seat cannot tilt, you can use a chair wedge cushion.
If the seat pan is uncomfortable because it is too stiff or saggy, you can use an ergonomic seat cushion. This adds height, so adjust the seat height accordingly.
Tip! Avoid a chair with too much cushioning. Although it can be comfortable initially, after a while the body sinks into the chair increasing pressure on the thighs and reducing circulation, which ultimately makes it uncomfortable.
Step 4
Backrest Height

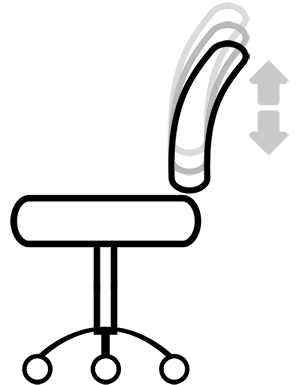
This is really about positioning the curved area of backrest, called the lumbar support. The spinal vertebrae at the bottom of the lumbar curve (curve of your lower back) support the weight of our upper body and are a common source of back pain.
Ideally, the height of the backrest should be adjustable, so you can fit the backrest’s lumbar support to your lumbar curve. Some office chairs have an independent lumbar support pad that allows you adjust to just the lumbar support on the backrest.
For it to be supportive, the shape of the backrest should mirror the shape of your back. Correctly positioned, the lumbar support helps to prevent the flattening of the lumbar spine that tends to occur when seated and supports the natural S-shape of the back.23 Again, this is simply a starting point. Some people prefer the lumbar support positioned slightly higher in the curve of their lower back.24
Goal: The backrest should support the lumbar curve, relieving some of the pressure on this area.
Adjust the height of the backrest so that the lumbar curve on the backrest fits into the curve of your lower back.25
How to adjust: Raise the backrest as high as you can. Then move the backrest downward in small increments until it feels most comfortable.
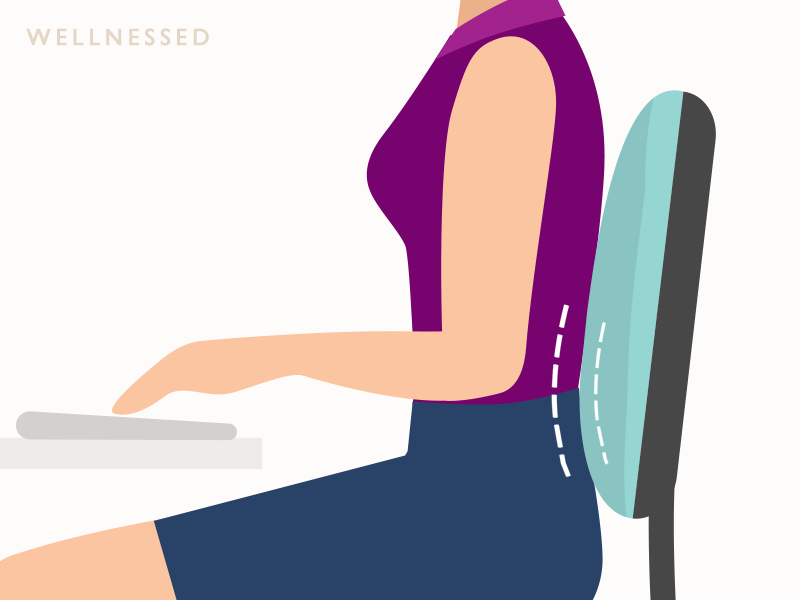
Chair controls: The controls for backrest/ lumbar height vary widely. Most office chairs will have a knob, button, or lever at the base of the backrest. Alternatively, there may be a ratchet style adjustment that you pull upwards one click at a time.
Add-on: If your chair does not have (enough) built-in lumbar support, you can place a lumbar-support cushion, rolled towel or small, firm cushion in the hollow of your lower back. Make sure the lumbar pillow doesn’t make the seat too shallow, pushing you to the edge of the seat. Adjust seat depth if necessary.
- Lumbar support too high: Pushes mid-back forward.
- Lumbar support too low: Puts pressure on the bottom of the spine and pushes the butt forward. This promotes slouching and strains the back.
Tip! You should sit all the way to the back of the seat to support your back. Not using the backrest is akin to holding a weight all day long. If you find you are not maintaining contact with the backrest you may need to sit closer to the desk.
Step 5
Backrest Tilt
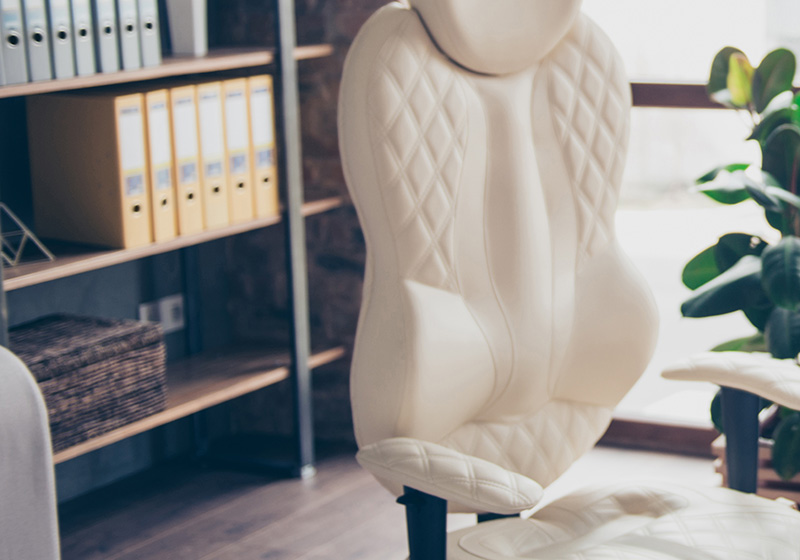
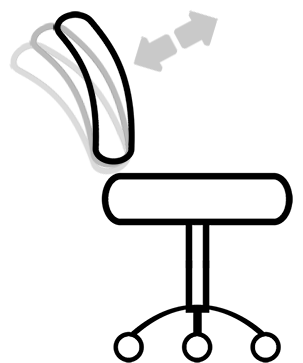
Changing the angle of the backrest relative to the seat allows you to change position:
When working forward the backrest should be straight, supporting an upright neutral position and allowing you to easily use your computer. In this position your torso and thighs are at a 90º angle.
When not working forward (e.g. talking, reading documents, at meetings) a slightly reclined posture tends to be more comfortable.26 Reclining the backrest slightly allows the chair to take more of your weight, makes the backrest more supportive, and decreases the stress placed on the muscles and discs of the lower back.27 Remember, it’s healthy to change positions regularly throughout the day.
Avoid leaning your upper body forward. The angle between your torso and thighs should not be less than 90° to prevent fatigue or discomfort.28
Goal: The backrest tilt should support the position you’ve adopted and the task you’re doing.
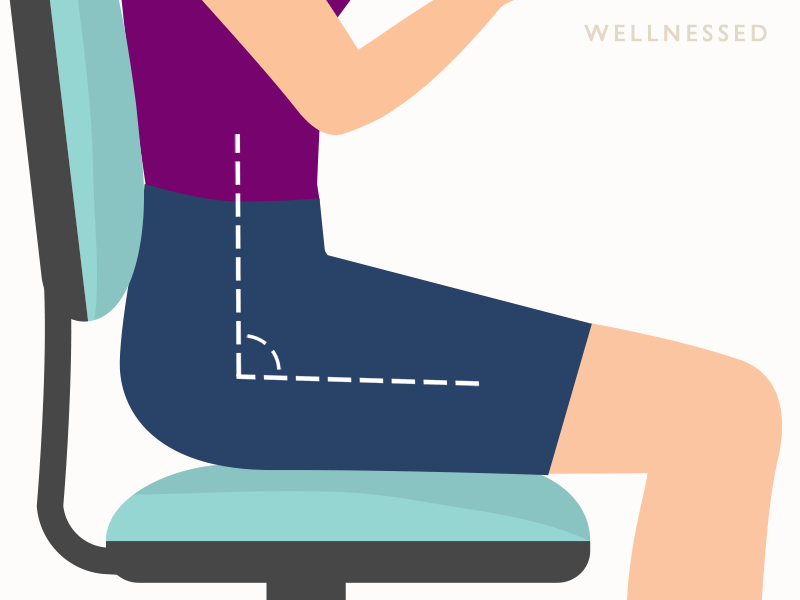
Chair controls:
- Backrest tilt: A lever on the (right) side of the chair toward the back.
- Backrest tension: A tension knob under the seat to adjust the level of resistance you feel when leaning back. The chair should be properly tensioned to allow you to lean back comfortably without needing much force, but without feeling like the backrest is giving way or that you’re falling out of the chair.
- Backrest lock: Chair may have a button to lock or unlock the backrest recline.
Step 6
Armrest Height

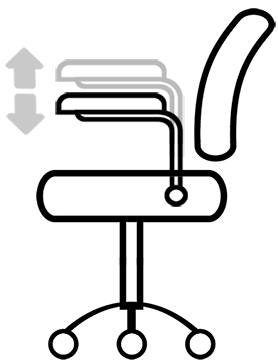
Armrests support the weight of your forearms and when correctly positioned reduce the load on the neck, shoulders and upper arms.31 This can help prevent upper body muscle strain and fatigue. Armrests can be especially beneficial when using the keyboard.32
Armrests are optional. Don’t use them if they impede your movements, interfere with your work, prevent you from getting close enough to the desk, or are otherwise incorrectly positioned. Lower or remove the armrests if they are disruptive. Incorrectly positioned, armrests become counterproductive, causing poor posture and discomfort.
Goal: Supporting your forearms to reduce the load on your shoulders and neck.
Chair controls: Usually a lever on the side of each armrest.
Armrests positioned at anything other than optimal height significantly increases the stress on the shoulders and neck – more than not using an armrest.35
- Armrests too high: You may compensate by scrunching up your shoulders to use armrests, leading to increased tension and fatigue in your neck, shoulders, and back.
Solution: If not possible to lower it to optimal height, do not use or remove the armrest. - Armrests too low: You may depress your shoulders or slouch down to lean on armrest, which also results in contact stress on your forearm or wrist.
Solution: Use armrest pads or duct-tape some foam to the armrest, raising the height.
Step 7
Armrest Width


Armrest width varies with shoulder breadth and ideally should be adjustable. Unfortunately, armrests are often spaced too far from body (see image above), especially in “one-size-fits-all” office chairs.
Do not use the armrests, if they are too wide and unadjustable. Armrests placed too far from your torso force you to hold your arms away from your body to use them. This awkward posture fatigues your shoulders and upper body, and leads to discomfort.
How to adjust: While seated with your shoulders relaxed, arms bent 90º and comfortably by your side, slide the armrest inwards until it is directly under your elbow.36
Chair controls: A knob under the armrest to adjust width of armrests, or simply swing arms in or out.
Armrest angle: Some office chairs allow you to change the angle of the armrest to support different work tasks and changes in posture. Pivot the armrests a little inwards to support your forearms when reaching inwards and in front, such as when you’re using the keyboard.
As you become used to adjusting your office chair, adjust it throughout the day according to how you feel and as you change tasks.
In addition to setting up your chair to support a healthy posture, there are many of other ways to improve your work space, including your desk, computer monitor, and keyboard. Find out how to set up an ergonomic home office.

